
Photography 101.
Learn your camera.
Learn photography with Joseph Hubbard at Hubbard.ART. These simple lessons explain your camera, depth of field, shutter speed, ISO, light and the histogram, followed by practical experiments you can try at home.
Start with the basics
Start with the basics
Start with the basics, then try the experiments. Open any lesson to read it. Before changing a setting, predict what it will do; afterwards, compare the photograph with your prediction.
What is a camera?A light-recording tool: learn what the lens, aperture, shutter, sensor and focus each do.
A camera records light reflected from a subject. The lens forms an image, the sensor records it, and the camera turns that information into a photograph. A camera cannot record the same clean detail in complete darkness as it can when enough light reaches the sensor.
Follow the light
- Lens: directs and focuses light to form an image.
- Aperture: an adjustable opening in the lens. It controls how much light passes through at a time.
- Shutter speed: how long the sensor records light for each photograph. Some cameras use an electronic shutter rather than moving shutter curtains.
- Sensor: turns the recorded light into an electrical signal.
- ISO: changes how that signal is used to produce image brightness.
Focus and brightness are different jobs
Focus determines which distance looks sharpest. Exposure settings help determine brightness and the appearance of motion and depth. A bright photograph can still be out of focus. A sharply focused photograph can still be too dark.
Find these controls before continuing
Locate aperture, shutter speed, ISO, the focus mode and the playback display. Look for M (Manual), A or Av (Aperture Priority), and S or Tv (Shutter Priority). Names differ between brands. Use your camera manual to find a control rather than changing settings at random.
Try it: frame the same stationary object, focus on it, take a photograph and review it. Identify the shutter speed, f-number and ISO shown with the image. Those three values will appear throughout these lessons.
Depth of field: what looks sharp, and why it mattersChoose whether attention stays on one subject or includes more of the scene.
Depth of field is the range of distances that looks acceptably sharp in a photograph. You focus at a particular distance; some space in front of and behind that distance may also look sharp. It is a gradual change, rather than a wall where sharpness suddenly stops.
Shallow or deep?
A shallow depth of field can separate a face, flower or animal from a distracting background. A deeper depth of field can help show several subjects or explain the surrounding habitat. Neither is automatically better. Choose according to what the photograph needs to communicate.
Aperture connects sharpness and light
A low f-number, such as f/2.8, means a wider opening. Compared with f/8 on the same lens and composition, it admits more light and gives a shallower depth of field. A higher number means a smaller opening and usually a deeper depth of field, but admits less light.
The available apertures depend on your lens. A lens that starts at f/5.6 cannot be set to f/2.8. Very small apertures can also soften fine detail through diffraction; the highest f-number is not automatically the sharpest choice.
Focus distance matters too
Focusing closer reduces depth of field. With the same camera position and f-number, using a longer focal length also gives a shallower depth of field. Background distance affects how blurred the background looks. Aperture alone cannot explain every result.
Remember: selecting a new focus point changes where the sharpest distance is. Changing aperture changes how much depth looks sharp around that distance. These are different controls. You will test both with the three-object experiment below.
Shutter speed: freeze movement or show itUnderstand the time in every photograph and the difference between subject motion and camera shake.
Shutter speed is the duration of an exposure. 1/1000 second is a short recording time. 1/30 second is much longer. When the denominator gets bigger, the fraction gets smaller: 1/1000 is faster than 1/100.
Movement takes place during the exposure
A fast shutter can make a moving subject appear still. A slower shutter records more of its movement as a blur or trail. The speed you need depends on the subject, its direction and distance, and how large it appears in the frame. A walking person and a spinning fan do not need the same setting.
The light trade-off
Keeping aperture, ISO and the lighting fixed, a longer exposure records more light and produces a brighter image. A shorter exposure records less and produces a darker image. Moving from 1/250 to 1/500 second halves the recording time and the light collected.
Two different kinds of blur
- Subject motion: the subject moves while the sensor is recording.
- Camera shake: the camera moves during the exposure.
A tripod helps with camera shake. It does not freeze a moving subject. Stabilization can help steady the camera, but it does not stop the subject either.
Try it: photograph a moving hand at several shutter speeds. Compare the hand with the stationary background. Keep the camera supported and check whether the whole frame is blurred or just the moving part.
The fan experiment below makes this difference easier to see. Its goal is to choose what movement looks like, rather than memorize one shutter speed for every situation.
ISO: changing brightness when light is limitedLearn what ISO changes, what it does not change, and why Auto ISO can hide the lesson.
On a digital camera, ISO helps determine how the recorded signal becomes image brightness. Raising it generally makes the image brighter when shutter speed, aperture and lighting stay fixed. It does not open the lens wider or give the sensor a longer exposure.
Start with a simple sequence
ISO 100, 200, 400, 800, 1600 and 3200 are full-stop steps. Going from 400 to 800 is a one-stop increase in ISO: the image is rendered approximately twice as bright, until clipping or processing limits intervene. The actual light reaching the sensor is unchanged if the other conditions stay fixed.
Why use a higher ISO?
Suppose a moving subject needs 1/1000 second and your lens is already at its widest useful aperture. If the image is too dark, a higher ISO may give you useful brightness while keeping that motion-controlling shutter speed. It is often better to accept some visible noise than lose the photograph to unwanted motion blur.
Why not use the highest setting all the time?
Higher settings can reduce highlight headroom and make noise more noticeable. The result depends on the camera, available light, exposure and processing. A lower number is not a guarantee of a cleaner image if the photograph is severely underexposed and later brightened.
Keep the experiment under your control
For the ISO exercise, use Manual mode and switch Auto ISO off. Otherwise the camera may quietly choose a different value or compensate for another setting. Outside the exercise, Auto ISO can be a useful tool; the point here is to see exactly which control changed.
After testing ISO, read the noise explanation below. Brightness and the amount of useful light captured are related, but they are not the same thing.
Lighting: why settings need to changeRespond to the amount, direction and contrast of light instead of copying someone else's settings.
Camera settings work within the light that is actually there. An exposure that works beside a bright window may look too dark farther inside the room. The camera has not become worse. Less light is reaching the subject and returning to the lens.
Amount, direction and contrast
- Amount: how much light is available for the exposure.
- Direction: where the light comes from and how it shapes the subject.
- Contrast: how far apart the bright and dark parts of the scene are.
Soft window light and direct sunlight can make the same subject look very different. Changing settings can alter recorded brightness, but it cannot move the sun, soften a hard shadow or remove a large brightness difference between a window and a dark room.
What changes when the light drops?
You can open the aperture, lengthen the shutter time, raise ISO, add suitable light, or change position. Each decision has a consequence. A wider aperture reduces depth of field. A longer exposure can blur movement. Raising ISO changes output brightness without collecting more photons.
Choose the important result first
For a stationary object, a supported camera may allow a longer exposure and more captured light. For a moving animal, a slow shutter might spoil the moment, so aperture and ISO become more useful choices. The correct response depends on what must stay sharp and what can change.
Try it: photograph an object beside a window and then farther into the same room. Keep all settings fixed first. Observe the brightness change. Then decide which one setting you would alter and explain the trade-off before taking the next picture.
There is no universal indoor setting or outdoor setting. Learning to assess the light is more useful than collecting settings without knowing the scene they came from.
Stops of light: what one step really meansOne full stop doubles or halves an exposure quantity; a dial click is often only one-third of a stop.
A stop describes a doubling or halving. With aperture or shutter speed, a one-stop change doubles or halves the light captured, when everything else stays fixed. A one-stop ISO change doubles or halves the approximate output brightness; it does not double or halve the light reaching the sensor.
Shutter: double or halve the time
1/1000 → 1/500 → 1/250 → 1/125 → approximately 1/60 second. Each move to the right is about one stop more light. Moving left is about one stop less. Some displayed fractions are rounded.
Aperture: use the full-stop sequence
f/1.4 → f/2 → f/2.8 → f/4 → f/5.6 → f/8 → f/11 → f/16. Each move to the right lets through about half as much light: one stop less. Moving left gives one stop more. Doubling the f-number is two stops, not one.
ISO: double or halve the number
100 → 200 → 400 → 800 → 1600 → 3200. Each move to the right is a one-stop increase in ISO. These changes can compensate for a reduction in captured light, but the image-quality result is not identical to actually capturing more light.
One click is not necessarily one stop
Many cameras use one-third-stop increments. Three clicks then equal one full stop. For example, f/4 → f/4.5 → f/5 → f/5.6 is three clicks but only one stop. Check how your camera is configured.
Balance one change with another
Start with f/4, 1/250 second and ISO 400. Changing to 1/500 loses one stop of light. Opening to f/2.8 restores the captured-light amount. Alternatively, ISO 800 restores approximate output brightness while the sensor still captured half as much light.
Predict it: if you change f/4 to f/8, how many stops do you lose? Two. At fixed ISO, changing 1/250 to about 1/60 second compensates by adding two stops of exposure time.
The histogram: read the light in your imageUse the brightness graph to check tones and possible clipping without chasing a perfect shape.
A histogram is a graph of the tones in the image. Dark tones are on the left, midtones in the middle, and light tones on the right. The height shows how much of the image falls into a particular tonal range. It does not show whether your subject is in focus or where those tones are located.
The graph should suit the subject
A dark scene may naturally put most tones toward the left. Snow or a bright background may push them right. Neither is automatically wrong. A good photograph does not require a centered bell-shaped histogram.
Watch the edges
Data pressed against the right edge can indicate clipped highlights: very bright areas rendered without detail. Data at the left edge can indicate clipped shadows. Consider whether those areas matter. A small lamp reflection is different from losing all the texture in a white bird.
Use the image, the histogram and the camera’s highlight warnings together. A brightness histogram can hide clipping in an individual color channel, so an RGB histogram is useful when strong colors are important.
Know what the camera is showing
The camera’s histogram and warnings usually reflect a processed JPEG preview, even if you shoot RAW. Picture style, contrast and white balance can influence the display. Treat it as a practical guide rather than an exact map of every recoverable RAW value.
Practice without guessing from screen brightness
Photograph a stationary scene in Manual mode at fixed aperture and ISO. Make one image, then a faster-shutter version and a slower-shutter version. Compare how the histogram moves. The darker version generally shifts left; the brighter version shifts right. Check where important detail disappears.
A brightened camera screen can make a dark photograph look convincing outdoors. The histogram gives you another way to judge the recording. It helps you make a decision; it does not make the decision for you.
The exposure triangle: put the controls togetherChoose depth, motion and brightness deliberately, then balance the trade-offs.
The exposure triangle is a way to remember aperture, shutter speed and ISO. All three affect image brightness, but they do different jobs. Aperture and shutter time control the light collected. ISO helps control the brightness produced from that recording.
Ask three questions
- Depth: how much of the scene needs to look sharp? This helps choose aperture.
- Movement: should motion freeze or blur? This helps choose shutter speed.
- Brightness: after those choices, what ISO gives a useful result without losing important highlights?
Equal brightness can look very different
In the same light, f/4 at 1/250 second and ISO 400 gives approximately the same brightness as f/5.6 at 1/125 second and ISO 400. The second combination has a smaller opening and a longer recording time. Depth of field and motion blur can therefore change even when brightness looks similar.
f/4 at 1/500 second and ISO 800 can also give similar brightness. It captures less light than the first combination, then uses a higher ISO. You gain a faster shutter, but the detail and noise may not look the same.
A practical decision order
Start with the part of the picture that cannot be compromised. For the fan experiment, motion is the priority, so choose shutter speed first. For three objects at different distances, depth of field is the priority, so start with aperture and focus. Then balance the other controls and check the result.
Manual mode is a learning tool
Manual mode makes it clear which settings you changed. Aperture Priority, Shutter Priority and Auto ISO can also be useful once you understand what they are doing. Using automation deliberately is still making a photographic decision.
Before the experiments: predict what should happen, take the picture, compare the result, and explain any difference. If the result surprises you, check whether an automatic setting changed at the same time.
Turn a setting into something you can see.
Simple subjects. Clear comparisons. Try the exercises with the camera you already own.

Experiment: freeze the fan—or make the blades fade
Open the exercise
Experiment: three objects, three focus distances
Open the exerciseExperiment: freeze the fan—or make the blades fadeUse shutter speed to turn the same moving subject into crisp blades, a blurred disc or nearly transparent movement.
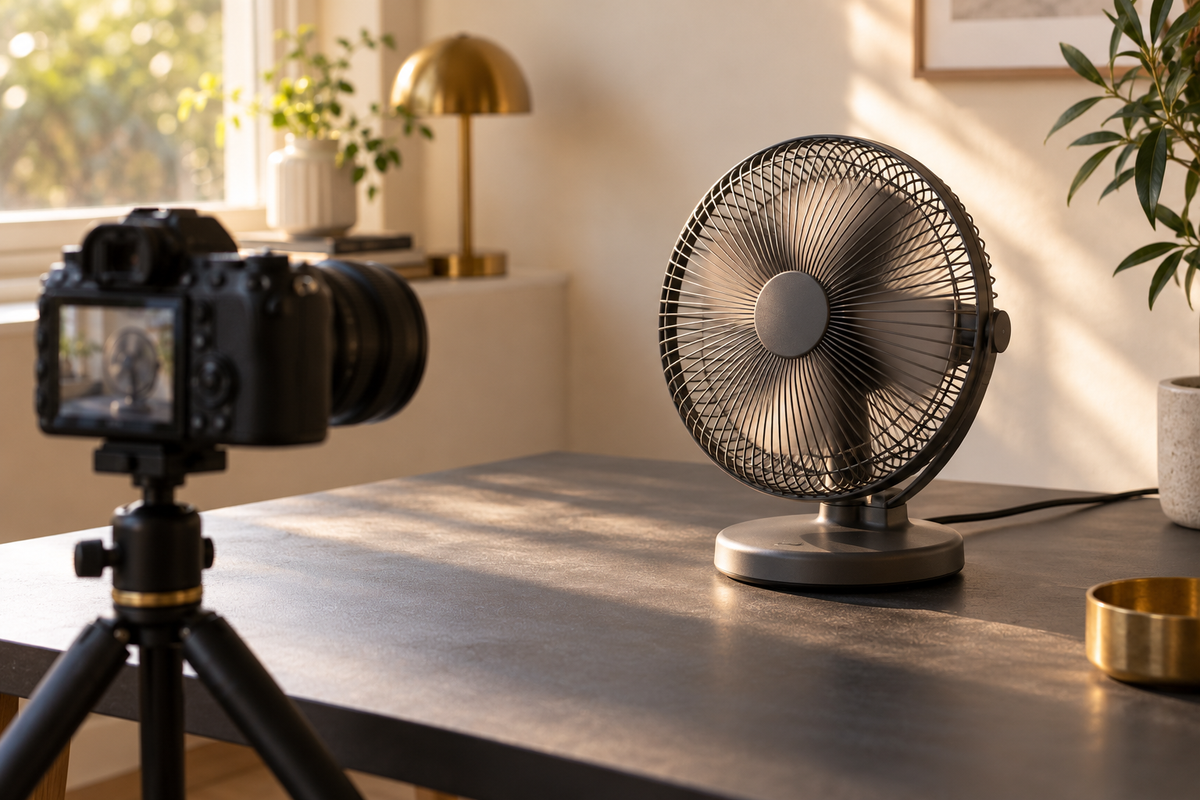
Set up
Use a household fan with its guard in place, a steady support or tripod, and a stationary background you can see through the moving blades. Keep the fan, camera position, framing and room light unchanged. Turn flash off. Focus once on the hub or a stationary part, then keep focus fixed.
First: isolate shutter time
- Choose Manual mode, a fixed aperture and a fixed ISO. Start in enough light to get a usable image at a fast shutter speed.
- Try 1/2000 or 1/1000 second. Increase the speed if the blades still show more movement than you want.
- Try 1/250, 1/60, 1/15 and 1/4 second. Keep the camera still.
- Compare the blade shapes and image brightness. With aperture and ISO fixed, the slow exposures will get brighter and may clip. That is part of this first test.
Then: compare motion at similar brightness
Repeat in Shutter Priority with Auto ISO if needed, allowing the camera to balance brightness. Check that the camera can actually achieve the requested exposure; a flashing aperture or ISO limit means it may not. Record which settings it changed. This second version isolates the visual effect of motion more clearly, but more than one exposure control is now changing.
What should happen?
A short exposure records little blade travel, so the blades look more distinct. A long exposure averages their movement across the frame. The background can show through the swept area, making the blades look faint or almost absent. You may get a translucent disc rather than a completely clear opening. The hub, guard, blade design, fan speed and background all affect the result.
Check your understanding
If the blades blur but the guard is sharp, the movement is in the subject. If the guard and background blur too, investigate camera shake or focus. If a slow exposure goes white, reduce ISO or close the aperture, or work in dimmer light. Do not conclude that slow shutter speeds cannot be used.
Success: make one photograph with recognizable blades and another with strong motion blur, then explain the setting trade-off. There is no requirement to make every trace of the blades disappear.
Experiment: three objects, three focus distancesPlace three subjects two metres apart and move the sharpest focus from one to the next.

Set up
Place three stationary objects roughly 2, 4 and 6 metres from the camera: two metres between each depth position. Stagger them slightly left and right so all three remain visible. Use a steady support, keep your position and focal length fixed, and choose the widest aperture your lens provides, such as f/2.8 or f/4.
Change focus first
- Use Aperture Priority and single-shot autofocus with a small selectable focus point, or focus manually. Keep the aperture unchanged.
- Focus carefully on the nearest object and take a picture.
- Move focus to the middle object and take another.
- Focus on the farthest object and take a third.
- Compare the actual objects at the same viewing size. The sharpest distance should move through the scene.
Now change depth of field
Refocus on the middle object. Photograph it at your widest aperture, then f/5.6, f/8 and f/11, as available. Leave focus, framing and camera position fixed. Aperture Priority will alter shutter speed, and possibly ISO if Auto ISO is enabled. Record those changes. With stationary objects and a supported camera, slower shutter speeds are manageable.
If more than one object still looks sharp
That does not mean the camera failed. A wide-angle lens or a distant focus position may give enough depth of field to include several objects. Try a longer focal length and the widest available aperture, or make a second version with a closer nearest subject while retaining clear separation in depth. Check the lens’s minimum focusing distance.
Do not expect every lens and camera to isolate all three distances equally. Focusing at the far object often leaves a larger acceptable sharpness range than focusing close. Focus accuracy, depth of field and the amount of background blur are related but distinct things.
Check your understanding
Question: did changing the focus point itself change the aperture? It should not. You selected a new sharpest distance. In the second series, changing aperture altered the depth around the chosen focus distance.
Success: identify which object you focused on in each image and show how a smaller aperture changes the surrounding sharpness range. Keep the camera stationary throughout each comparison.
Experiment: ISO in a half-lit roomKeep shutter speed and aperture fixed, change only ISO, then compare brightness and noise fairly.
Set up
Choose a half-lit room with a stationary subject that includes fine texture, a plain surface and a shadow area. Use a tripod or stable support, constant lighting, fixed white balance and the same focus. Use RAW plus JPEG if available. Keep flash off and avoid an automatic brightness adjustment in playback or your editor when comparing files.
Change ISO only
- Select Manual mode and turn Auto ISO off.
- Choose an aperture and shutter speed, for example f/4 and 1/125 second. These are starting points, not a promise of the right exposure in your room.
- Set the room or starting combination so ISO 100 gives a dark but recognizable image and the later settings do not all become completely white.
- Make a series at ISO 100, 200, 400, 800, 1600, 3200 and 6400, stopping if important highlights clip badly.
- Do not change shutter, aperture, lighting, camera position or focus. Note what gets brighter and what happens in the shadows.
What this test proves
Each ISO doubling raises approximate output brightness by a stop. The sensor received essentially the same amount of light in every exposure because the light, aperture and recording time stayed fixed. ISO did not let extra light into the room or the camera.
A fairer noise comparison
The images have different brightness, so comparing them directly does not isolate noise very well. In a RAW editor, brighten a lower-ISO file to match a higher-ISO file, keeping noise reduction and other processing comparable. Compare the same crop at the same displayed brightness and size. Results vary with the camera; higher ISO is not guaranteed to look noisier than a heavily brightened low-ISO exposure.
Then test what more light changes
For a separate comparison, photograph the same static scene at a low ISO with a longer shutter time, keeping aperture fixed, to reach similar brightness. For example, ISO 400 at 1/15 second and ISO 3200 at 1/125 second are approximately equivalent in output brightness. The slower exposure gathers about eight times as much light. This is a new test: shutter speed has intentionally changed.
Success: explain why the ISO-only sequence gets brighter without gathering more light, then describe how the longer-exposure comparison differs. Read the noise explanation next before deciding that ISO alone caused everything you see.
Understand the result
Noise: why shadows can look grainy or speckledUnderstand the difference between a brighter image and a stronger, cleaner light signal.
Digital noise is unwanted variation in the recorded image. You may notice grain-like brightness changes, colored speckles, or patterns in smooth areas. It is easier to see in weakly lit shadows and when a dark image is brightened strongly.
Less captured light means a weaker signal
Light arrives with natural statistical variation, and the camera’s electronics add their own noise. With fewer captured photons, the useful signal is harder to distinguish from that variation. A higher ISO may make the weak recording look brighter, but it cannot replace photons that were never captured.
Do not blame the number alone
In everyday photography, higher ISO is often used when light is scarce or shutter time is short. That is why high-ISO photographs are commonly associated with noise. At the same aperture, shutter speed and scene lighting, however, the outcome also depends on sensor electronics and processing. A higher ISO can sometimes compare well with a low-ISO image brightened later.
What can help?
- Give the sensor more light when possible: use a wider suitable aperture, a longer exposure for a still subject, or better illumination.
- Avoid unnecessarily dark recordings that need extreme brightening, while protecting important highlights.
- Choose a shutter speed that actually keeps the subject sharp. A noisy sharp image may be more useful than a clean blurred one.
- Use noise reduction thoughtfully. Strong reduction can remove fine detail along with noise.
- Compare at the intended display or print size, not only at extreme magnification.
Noise, missed focus and motion blur can all reduce apparent detail, but they are not the same problem. Use the stationary and moving parts of the scene to help identify which one you are seeing.
The main idea: collect enough useful light for the picture you want, then use ISO to achieve workable brightness. The lowest ISO is not a rule worth following at the cost of the whole photograph.
See the lesson in the photograph.
Real photographs to look at as you learn. Notice the sharp subject, the moving water, and the changing quality of light.
Return to the lessons

